In this instruction piece, PGA professional GRANT HEPBURN demonstrates how to visualise what you’re planning to do.
Given that the average amateur misses more greens in regulation than he or she hits, having a strong short game is vital for protecting your score. Assuming the lie is good and there’s not too much trouble between yourself and the putting surface, most chipshots around the green give you a number of options.
You can fly the ball high and try to land it softly, or you can get the ball rolling as quickly as possible. Whatever the strategy you choose, it is important that you land the ball in the right area on the green, and that takes shot visualisation and a fair bit of practice.
An effective way to learn to visualise getting the ball closer to the hole is to try to throw the ball underhand to the hole.
Getting it right: The low runner
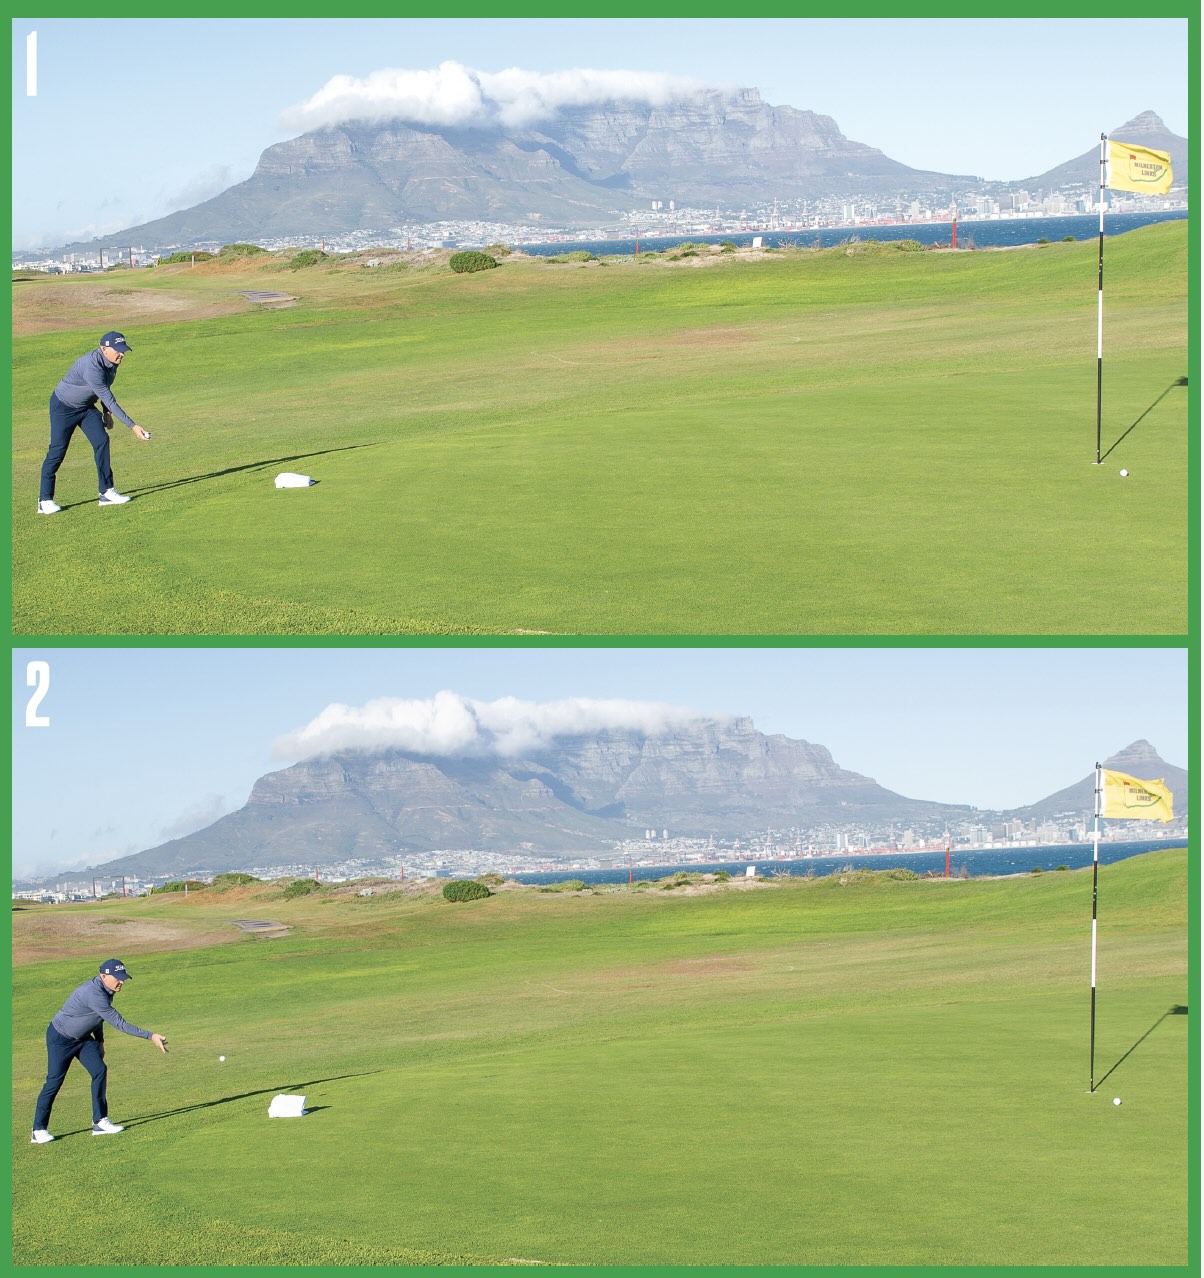
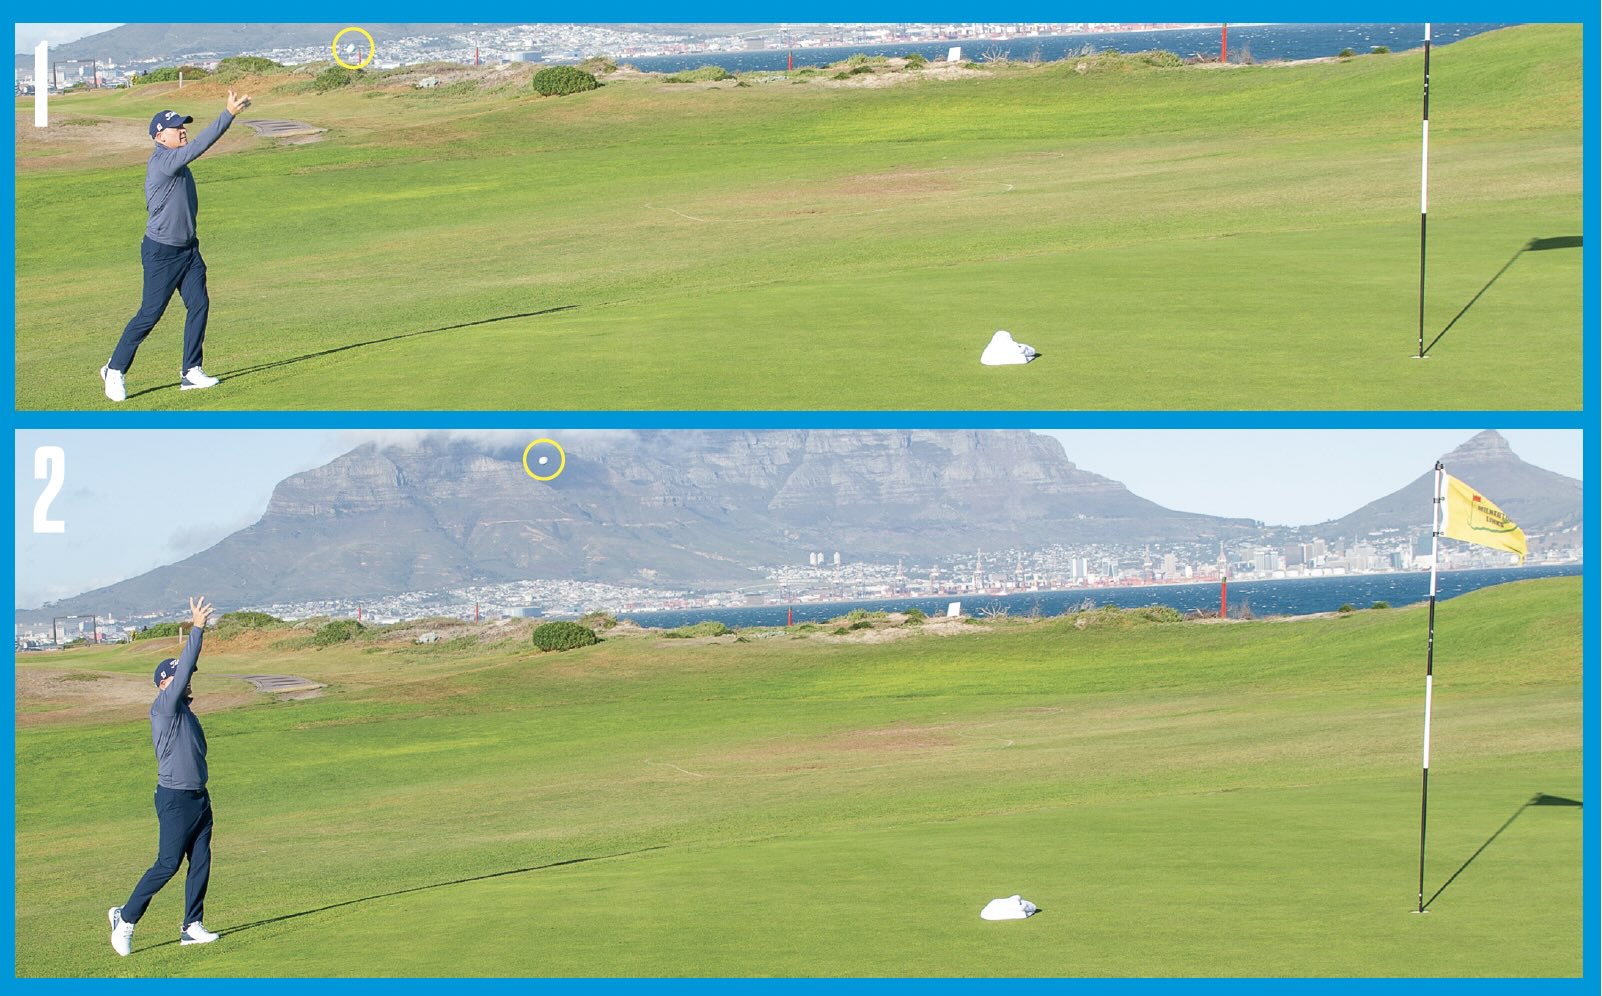
In the first scenario, I am trying a low, running throw that will land on the front of the green and then roll a long way up to the hole. Part of the visualisation drill is to throw the ball a couple of times and note where it lands. Then I place a towel on the landing area to mark the spot.

Getting it right: Floating it high
In the second scenario, I am trying a high lofted underhand lob to the hole. This is a useful shot for when you don’t have a lot of green to work with. The ball will fly high and land softly with very little roll. Once again, after I have done this a few times, I will use a towel to mark the spot where the ball lands.
In most cases, you will find that one of these two scenarios feels more natural than the other. The more comfortable option will be the one that suits your eye best and felt most natural to do. That is the option that you should choose when you play the shot with your golf club – because it’s the option that your instincts find the easiest.

If the first option is the one that you feel suits you best, you are going to be playing the chip-and-run shot.
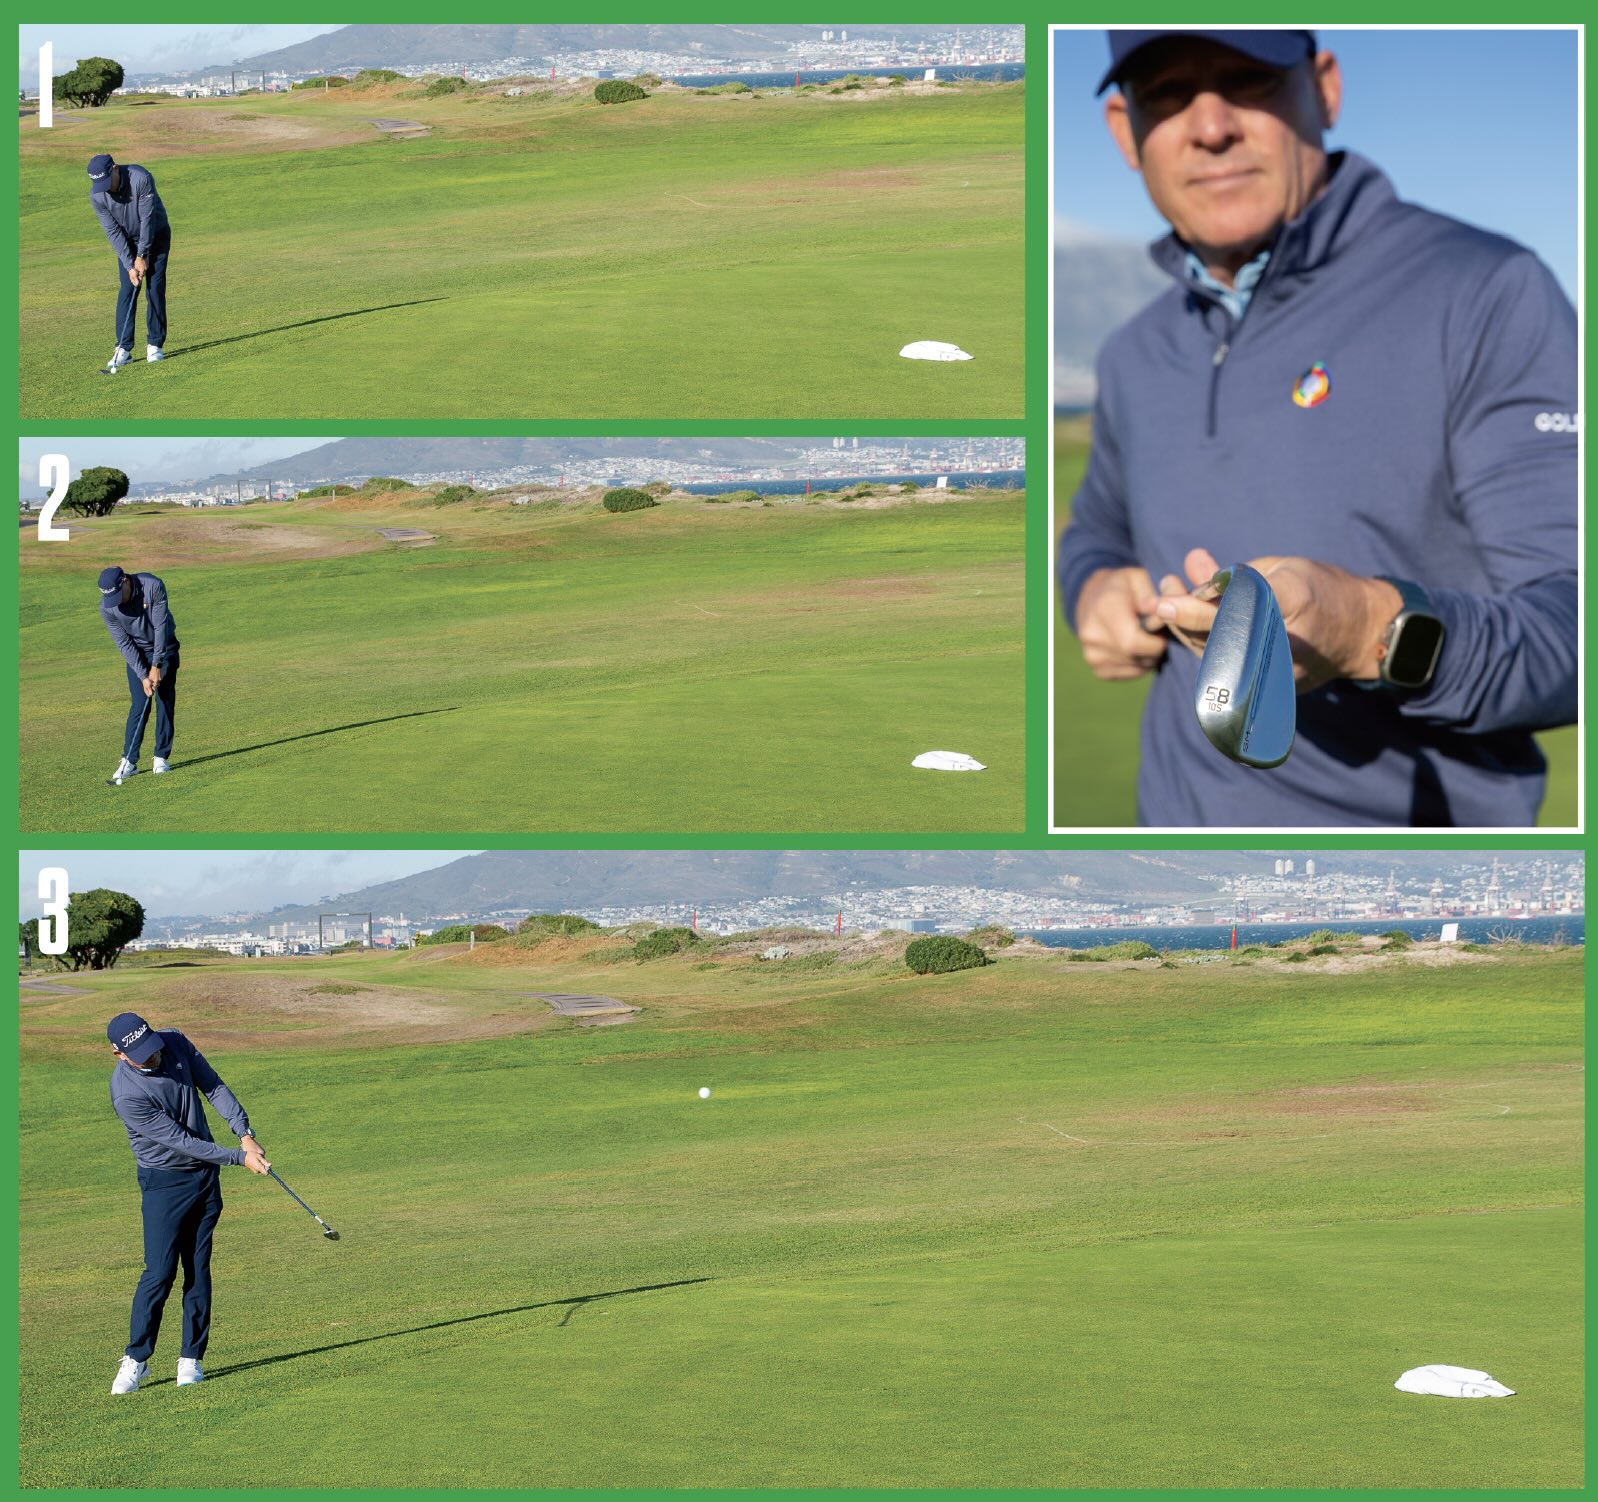
This will require a club with less loft, that gets the ball taking off on a low trajectory, landing on the towel at the front of the green and rolling up to the hole. I have chosen a 9-iron for this.

At this point, I’m not even thinking about the flag as I know from my ball-throwing drill that the ball will finish near the hole if I land it on the spot that I marked with the towel.
You will see that I have set up with my weight mostly on the front foot, and with my hands ahead of the ball to assist in keeping the flight low and running. I make a smooth chipping action, without much wrist hinge, and the ball pops off the clubface and runs up to the hole.
If the second option is preferable to you, then take a more lofted club, such as a sand-wedge. I am using a 58-degree lob-wedge here
I still have my weight on my left side when I set up, to ensure a good crisp strike on the ball, but my hands are not as far ahead in the set-up. This is to help keep maximum loft on the clubface so that the ball can take off on a higher trajectory. My landing spot is again on the towel, which is now much closer to the hole. I use a little bit of wrist hinging and clip this ball up into the air, allowing the 58 degrees of loft to do the job of flopping the ball up high. This will result in a soft landing and very little roll.
It’s important to note that either of these options will work, but it’s about choosing the shot that feels more natural to you and what suits your eye best.

– This article first appeared in the June 2024 issue of Compleat Golfer magazine.

The post Golf instruction: Visualisation techniques appeared first on Compleat Golfer.
Article Link: Golf instruction: Visualisation techniques
